Office Scripts and Typescript First Steps


Table of contents
Well, folks, hold onto your keyboards because I've got a tale of technological enlightenment for you! Picture this: I'm innocently sitting at my desk, minding my own business, when suddenly, I stumble upon something called "Office Scripts." Intrigued, I decided to take a peek. Lo and behold, it's like discovering a secret world within the realm of Microsoft Office, and the language they're speaking is TypeScript! Now, I don't know about you, but TypeScript and I were like two ships passing in the night – we'd never officially met. But you know what? TypeScript and I might just be the dynamic duo nobody saw coming. Stay tuned as I embark on my quest to conquer this brave new frontier :)
About Office Scripts
First things first - some info from Microsoft:
Office Scripts in Excel let you automate your day-to-day tasks. To use them in Excel, you will need any commercial or educational Microsoft 365 license with access to the Microsoft 365 Office desktop.
You can easily connect them with Power Automate.
Link to the official documentation: https://learn.microsoft.com/en-us/office/dev/scripts/
Task
I have to copy specific columns from a sheet and add two additional columns...
Ctrl+C is ordinary and boring and I want it automated... So why not spend some time and reinvent the wheel :)

The Data
Simple and basic customer data, randomly created by chatGPT (my best friend when it comes to short random data).
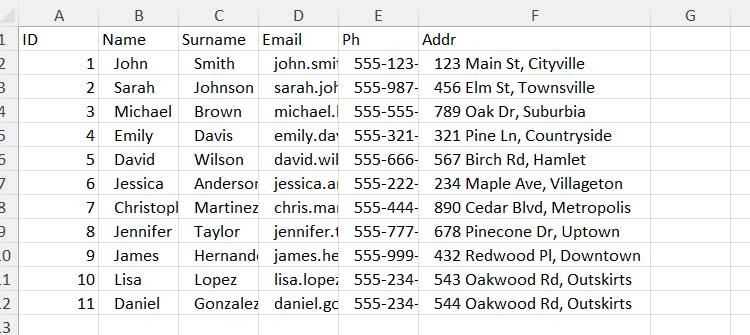
The Task
I only want to copy the email and address in columns C and D but also add the current month number in A and "hello" in B... because why not
The Script
Here comes the code:
function main(workbook: ExcelScript.Workbook) {

    let newSheetName: string = "CopiedData2";
    let sourceSheetName: string = "master data";
    let sourceSheet: ExcelScript.Worksheet | undefined = workbook.getWorksheet(sourceSheetName);

if (!sourceSheet)
    {
        console.log(`Worksheet "${sourceSheetName}" not found.`);
        return;
    }

    const monthNum: number = new Date().getMonth() + 1;

    let usedRangeD: ExcelScript.Range = sourceSheet.getRange("D:D").getUsedRange();
    let usedRangeF: ExcelScript.Range = sourceSheet.getRange("F:F").getUsedRange();

    let valuesD = usedRangeD.getValues();
    let valuesF = usedRangeF.getValues();

    let newSheet: ExcelScript.Worksheet = workbook.addWorksheet(newSheetName);

    let numOfR: number = valuesD.length;
    let pasteRangeD: ExcelScript.Range = newSheet.getRange("C1:C" + valuesD.length);
    let pasteRangeF: ExcelScript.Range = newSheet.getRange("D1:D" + valuesF.length);
    let pasteRangeA: ExcelScript.Range = newSheet.getRange("A1:A" + valuesD.length);
    let pasteRangeB: ExcelScript.Range = newSheet.getRange("B1:B" + valuesD.length);

    pasteRangeD.setValues(valuesD);
    pasteRangeF.setValues(valuesF);


    let monthArray: number[][] = new Array(numOfR).fill([monthNum]);
    pasteRangeA.setValues(monthArray);


    let helloArray: string[][] = new Array(numOfR).fill(["hello"]);
    pasteRangeB.setValues(helloArray);
    newSheet.getRange("A1:D2").delete(ExcelScript.DeleteShiftDirection.up);

    console.log(`Data from columns D and F copied to "${newSheetName}" sheet, and the first three rows are deleted.`);
}
And now step by step:
Function Definition: The script starts with defining a main function, main(workbook: ExcelScript.Workbook). This function is intended to be executed in an Excel environment.
New Worksheet Name: It sets a variable newSheetName with the value "CopiedData2." This name will be used for a new worksheet where data will be pasted.
Source Worksheet Name: Another variable, sourceSheetName, is set to "master data." This identifies the source worksheet from which data will be copied.
Source Worksheet Retrieval: The script attempts to retrieve the source worksheet using workbook.getWorksheet(sourceSheetName) and stores it in the sourceSheet variable. If the sheet is not found, it logs an error message and exits.
Current Month: It calculates the current month number and stores it in the monthNum variable. This is done by using JavaScript's Date object.
Used Range for Columns D and F: The script defines two variables, usedRangeD and usedRangeF, representing the used ranges in columns D and F of the source sheet.
Data Extraction: It extracts the values from these used ranges and stores them in valuesD and valuesF variables.
New Worksheet Creation: A new worksheet is created within the same workbook and assigned to the newSheetvariable.
Defining Paste Ranges: It defines several ranges (pasteRangeD, pasteRangeF, pasteRangeA, and pasteRangeB) in the new sheet where data will be pasted.
Data Pasting: Data from valuesD and valuesF is set into pasteRangeD and pasteRangeF respectively, copying the information into the new worksheet.
Column A and B Population: Columns A and B in the new worksheet are populated with the current month number and the text "hello," respectively, to match the copied data rows.
Data Cleanup: The first three rows in the new worksheet are deleted (because I wanted to see how it would behave). Using the delete function with the ExcelScript.DeleteShiftDirection.up option, shifting the remaining cells upwards.
Logging: Finally, a message is logged to the console, indicating that data from columns D and F has been copied to a new worksheet named "CopiedData2," and the first three rows have been deleted.
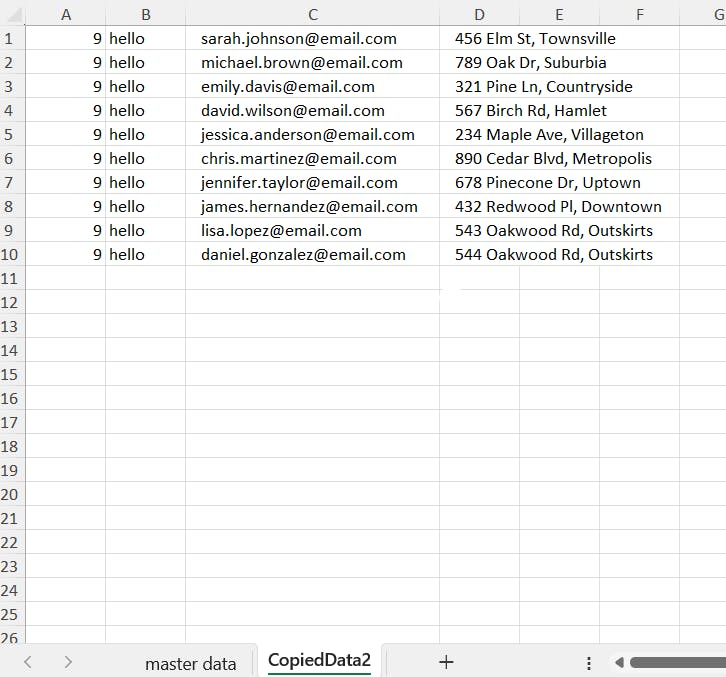
The Final Result
Voila, works like a charm: